Using the documentation system effectively
The Fluid docs are built using Hugo. It contains many of the features one would expect from a modern documentation system. Content is written in Markdown.
Contents:
Building documentation locally
Generating API documentation
To build the API documentation, do the following from the root of the repository:
npm install
npm run build:fast -- --symlink:full --install --all
npm run build:fast -- -s build:docs --all
This will generate a JSON representation of all the TSDoc comments, which will be transformed into Markdown in the next step.
Building documentation site with Hugo
To build the docs themselves, you’ll need to switch to the docs/ folder, install the dependencies, and then build the
site.
cd docs
npm install
npm start will serve the local documentation from http://localhost:1313/, while npm run build will build the full
documentation site and output it to docs/public/.
Both npm start and npm run build will convert the TSDoc JSON into a tree of Markdown files under
docs/content/apis/ as part of the site build. These files should not be committed to Git.
Documentation sources
The Fluid documentation comes from multiple sources.
- Narrative documentation
- The overall structure of the documentation comes from Markdown files in the
docs/folder. - Automated API documentation
- The contents of the API section is built from TSDoc comments in the source code.
Features
Reusable snippets
If you want to re-use a snippet in multiple places, place the snippet file in docs/_includes/. You can then reference
it in a Markdown file like so:
{{% include file="_includes/node-versions.md" %}}
Syntax formatting and line highlighting
Code blocks can specify a language to enable syntax highlighting of the block. You can also highlight specific lines in the code block.
Input
```ts {linenos=inline,hl_lines=["2-6",9]}
const numericInput = (keyString: string, coord: string) => {
  let valueToSet = Number(keyString);
  valueToSet = Number.isNaN(valueToSet) ? 0 : valueToSet;
  if (valueToSet >= 10 || valueToSet < 0) {
    return;
  }

  if (coord !== undefined) {
    const cellInputElement = getCellInputElement(coord);
    cellInputElement.value = keyString;

    const toSet = props.puzzle.get<SudokuCell>(coord);
    if (toSet.fixed) {
      return;
    }
    toSet.value = valueToSet;
    toSet.isCorrect = valueToSet === toSet.correctValue;
    props.puzzle.set(coord, toSet);
  }
};
```
Output
 1const numericInput = (keyString: string, coord: string) => {
 2  let valueToSet = Number(keyString);
 3  valueToSet = Number.isNaN(valueToSet) ? 0 : valueToSet;
 4  if (valueToSet >= 10 || valueToSet < 0) {
 5    return;
 6  }
 7
 8  if (coord !== undefined) {
 9    const cellInputElement = getCellInputElement(coord);
10    cellInputElement.value = keyString;
11
12    const toSet = props.puzzle.get<SudokuCell>(coord);
13    if (toSet.fixed) {
14      return;
15    }
16    toSet.value = valueToSet;
17    toSet.isCorrect = valueToSet === toSet.correctValue;
18    props.puzzle.set(coord, toSet);
19  }
20};
Info/tip callouts
It is often useful to draw special attention to some content in the docs, such as a tip about proper usage, a warning about possible security issues when using an API, etc. This can be done using the following syntax in Markdown files:
{{< callout tip >}}

This is a tip.

{{< /callout >}}
Which would render this:
Tip
This is a tip.
Types
Several different “types” are defined, each with special formatting. tip is show above, but note, important,
warning, and danger are also supported.
Note
This is a note.
Important
This is important!
Warning
This is a warning
Danger
This is a dangerous warning
Custom titles
By default, each box’s heading is the type. You can change this by providing a title after the type.
Input
{{% callout note "A note about syntax" %}}

Markdown formatting _goes_ **here.**

{{% /callout %}}
Output
A Note about Syntax
Markdown formatting goes here.
Diagrams
We prefer text-based diagrams that are converted to images at build time. You can create inline diagrams with Mermaid, or you can create ASCII art diagrams that will be converted to PNGs at build time.
Mermaid diagrams
Mermaid diagrams can be put inline in a Markdown file using the {{< mermaid >}} shortcode.
Mermaid examples and syntax reference.
Input
{{< mermaid >}}
classDiagram
Class01 <|-- VeryLongClass : Cool
Class03 *-- Class04
Class05 o-- Class06
Class07 .. Class08
Class09 --> C2 : Where am I?
Class09 --* C3
Class09 --|> Class07
Class07 : equals()
Class07 : Object[] elementData
Class01 : size()
Class01 : int chimp
Class01 : int gorilla
Class08 <--> C2: Cool label
{{< /mermaid >}}
Output
ASCII art diagrams with ditaa
ditaa is a tool to convert ASCII art block diagrams to PNGs. Any file
in the /docs/content folder with a .ditaa file extension will be converted to a PNG file in the same folder at
build time.
asciiflow is an in-browser editor that makes it easier to create ASCII art block diagrams.
Input
+-------------------+    +---------------------+
|                   |    |                     |
|                   |    |                     |
|  Input            +--->+   Output            |
|                   |    |                     |
|                   |    |                     |
|                   |    |                     |
+-------------------+    +---------------------+
Output
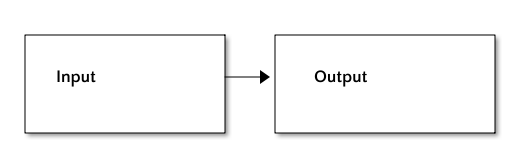
Read more about ditaa here. Note that we are using a fork of the original implementation re-written in Go to remove a Java dependency.
Markdown enhancements
Typography
Ellipsis: … ...
Em dash: — ---
En dash: – --
Definition lists
You can create definition lists using the syntax defined by PHP Markdown Extra.
Input
Apple
: Pomaceous fruit of plants of the genus Malus in
the family Rosaceae.

Orange
: The fruit of an evergreen tree of the genus Citrus.
Output
- Apple
- Pomaceous fruit of plants of the genus Malus in the family Rosaceae.
- Orange
- The fruit of an evergreen tree of the genus Citrus.